Sunday, December 2, 2012

I thought I was done with things for the trip....

but found another project!  I decided I needed to use the rest of the "Texas Longhorn" fabric and make some luggage tags.  Browsing around Pinterest, I found a few tutorials on making them, but eventually ended up using a few hints from different ones and came up with my own design.

One thing I did use was how to print on fabric.  I had heard many people do this, but never did myself.  I just always bought the special paper at craft stores, but this is MUCH CHEAPER!!  Which, if you know me at all, you know is something I LOVE.  Anyway, you just use freezer paper and iron the shiny side to the fabric.  I did that before I cut the fabric to the size of a regular piece of paper, 8 1/2 by 11.

Anyway, I printed them off and went on my way.  The first one I made didn't turn out too great, so I kept going and ended up with this:

Photobucket

One for each of our new piece of luggage.  Our two checked bags and two carry-ons.

Other side:
Photobucket

I made them so they just fold in half, and a small piece of velcro keeps it closed.   Here's the inside:
Photobucket

I did put a piece of interfacing underneath the address for a little stiffness and just used elastic I had on hand to attach them to the handles.  I already have a small piece of this fabric tied onto all the handles, so these will be additional.  It will make our luggage much easier to find at the airport!

Thursday, November 8, 2012

A Couple More Projects Done for Hawaii Trip

I'm slowly getting things done that have been on my "To-Do for Hawaii" List.  One of the things I decided to do was a cover for my Canon Rebel Strap.  I had made one out of flannel before, but I really wasn't too happy with it.  I had bought some orange "UT" fabric a little while ago to use to mark our luggage for the trip and had some left over, so decided to use it for the new strap.
Here's the new strap cover:
Camera Strap
In case you're interested, here is the tutorial I used.  I like that it's nice and tight on the strap.
I had to use my other camera to take the picture, so it's not very good.

I also wanted to make some pouches to keep all my cords in.  Decided to dig out the Bernina sewing machine (that used to be my mother-in-law's) to label them.  Again, the pictures aren't that great.
Pouches for cords

A closer look at how they are labeled.  I had some old fabric paint brushes from years ago so used them to color in the letters.  The "ear phones" one I tried to used some dimensional fabric paint but that didn't work very well.  lol
Pouches for cords
In case you are wondering, here is the link for the tutorial for these.

Finally, I had been looking for something small to use for a travel journal.  I know I'll take one of our laptops so I can upload photos, but it's nice to put pen to paper every once in a while.  I had one for our cruise in 2010, so decided I wanted one for this trip, too.  Anyway, this is what I found at TJ Maxx for about $4 the other day:
Travel Diary Re-Do
They are small and don't take up too much room, but they're not very pretty.
Travel Diary Re-Do

So, I decided to try to put new covers on them.  I had bought some scrap paper a while ago for another project, so decided to use that to recover them.
Travel Diary Re-Do

These are the pages I decided to use:
Cover:
Travel Diary Re-Do

And the books:
Travel Diary Re-Do

Travel Diary Re-Do

Travel Diary Re-Do

All  I did was cut the sheets to the correct size, decided what I wanted on the cover and books, then used a glue stick to glue the sheets on.  It worked petty good, even though I had to take about 6 pages out of each book so they wouldn't be too tight in the cover.

This is after they were covered:
Travel Diary Re-Do

Travel Diary Re-Do

Photobucket

Then I decided to make some labels (printed on clear labels), then coated with modge podge (homemade, recipe here).  I was pretty happy with them, but while organizing the office (for the millionth time), I found some spray laquer that said it was good for decoupage, so decided to spray that on, too.  Here is the finished project:
Travel Diary Re-DoTravel Diary Re-Do

Quite an improvement!!!!!

Travel Diary Re-Do

Travel Diary Re-Do

Travel Diary Re-Do

Travel Diary Re-Do


They're not perfect, but I'm really happy with how they turned out!

I still have some shopping to do before our trip, but need to go through my current wardrobe first to decide what else I need.  Counting down the days!!!!!!  Todd and I are both really looking forward to the trip!

Thursday, November 1, 2012

Just another quick post

I've had a little free time, so decided to do some more sewing.  One thing that I finally got done was a Roman Shade for the storage rooms above our garage.  The sun comes in pretty bad, so I bought supplies and made the shade out of off-white denim.  I decided on denim because it needed to be pretty sturdy and off-white because that is the main color of the garage.  The trim on the garage is a dark blue, but if I had made the shade that color, it just would have faded, so settled on the off-white.

This was the first Roman Shade I've made, and it certainly could have been better, but it turned out pretty good.  I haven't taken a picture yet, but when I do, I'll post it.

Time is getting closer to our trip to Hawaii!!!  (50 days!!!)  While cruising around Pinterest the other day, I found a quick project to hold our toothbrushes and toothpaste for the trip.  Here's the link.  Needless to say, I decided I could whip that up pretty quick.  I didn't use a hand towel or anything, I have a couple different colors of terry cloth in my "fabric stash" so used that.    Here are the two I made:

the first one has two layers of terry cloth.
Photobucket

I used some flannel for the binding and just basic ribbon to tie it closed.
Photobucket

I decided it was a little bulky, so the next one is only one layer of terrycloth.
Photobucket

I also added a little flap on the top to keep things from falling out.
Photobucket

Photobucket

I'm not exactly sure which one we'll end up taking, it's always possible that we'll each take one since Todd always has his stuff packed for the truck.  I may end up making another one that will only hold one toothbrush and one toothpaste.  Mainly they will be nice to keep on the counter at the resort where we're staying.

Yesterday was Halloween.  Before Tab and the kids moved out again, I sat down with Alyssa and Angel and we made Tombstones for the front yard for decorations.  I finally put them out yesterday - here's a picture.
Halloween 2012

A better look at the one I did - the orange is supposed to be glow in the dark.
Halloween 2012

The only other decoration I had outside were the solar lights that are always there.  I found some cheap Orange napkins, so cut slips of them and put them in the lights so they glowed orange.  The kids enjoyed them!!!
Halloween 2012

I still have a couple more things I need to make for the trip, so keep checking back.  McKenna, our youngest grandchild who we'll see in Hawaii, has asked for a mermaid tail, so as soon as I get her measurements I'll get that made and take it to her for a Christmas present this year.


Thursday, October 18, 2012

I know it's been forever......

There have been some major changes in our house that has really cut down on my craft/sewing time.  I'll post about it on my other blog and add a link when it's done.

In the mean time, I did get one project completed. We needed a new bag for our tent. Tab and I put it up for the grandkids the weekend of Columbus day and the old bag ripped when we took it out of the garage.  SOOOOOOO, Todd said "K, just sew a new one!".   LOL  He knows me so well!

I took the old bag apart and used it as a pattern, just added a few inches in the length so it's easier to put the tent in.  Here's the finished bag (not a very good picture, but you get the point).

Photobucket

I had originally purchased this fabric to make cushions on the new white wicker chairs I bought for the garden.  However, I decided they didn't really need them and since this is "outdoor" fabric, it would work great for the tent.  It's much heavier than regular cotton fabric.

After I had the bag done, I was wishing I'd added pockets for the tent stakes, instructions, etc.

Just in case you're wondering, here's the tent in our backyard.
Photobucket

 This was the first time it's been used in probably 12 years or so.  I was very happy there were no holes or anything in it.  Tab and I only spent 30 minutes putting it up and the kids had so much fun playing in it.  Tab, Alyssa and Angel slept in it all night on Friday, then the weather turned much colder so couldn't the rest of the weekend.

I'm hoping I'll get to carve out more time for "me", but we'll see.  I do still have a few things I want to get done before our trip over Christmas.

Sunday, August 26, 2012

Finally finished my new purse (and accessories)!

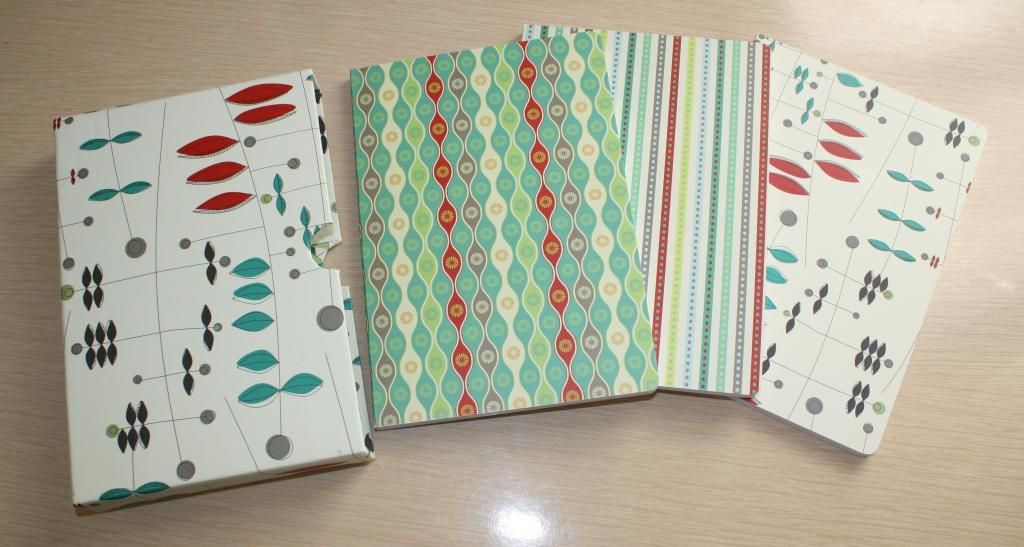
My old purse was really showing its wear and I have been wanting to make a new one for quite a while.  I even bought fabric a while ago, but decided it wasn't what I wanted anymore.
Here it is with the fabric I bought for the lining:
Photobucket
I'll have to figure out what to do with that fabric, now.

Here is the post that shows my now old purse (and matching laptop bag).

 I was at JoAnn's a week or two ago (I go there pretty much weekly) and found some heavy fabric - not quite as heavy as home decor, but still heavy so I broke down and bought some.  I should have bought more, but I think I had three yards.  Next time I think I'll just buy it all, because I went back to get some more and it was gone!

I've been thinking of how I want to make my new purse for a while.  I liked the last one, but it was too small (it started out larger, but the corners wore and I had to re-do it and cut an inch off each side).

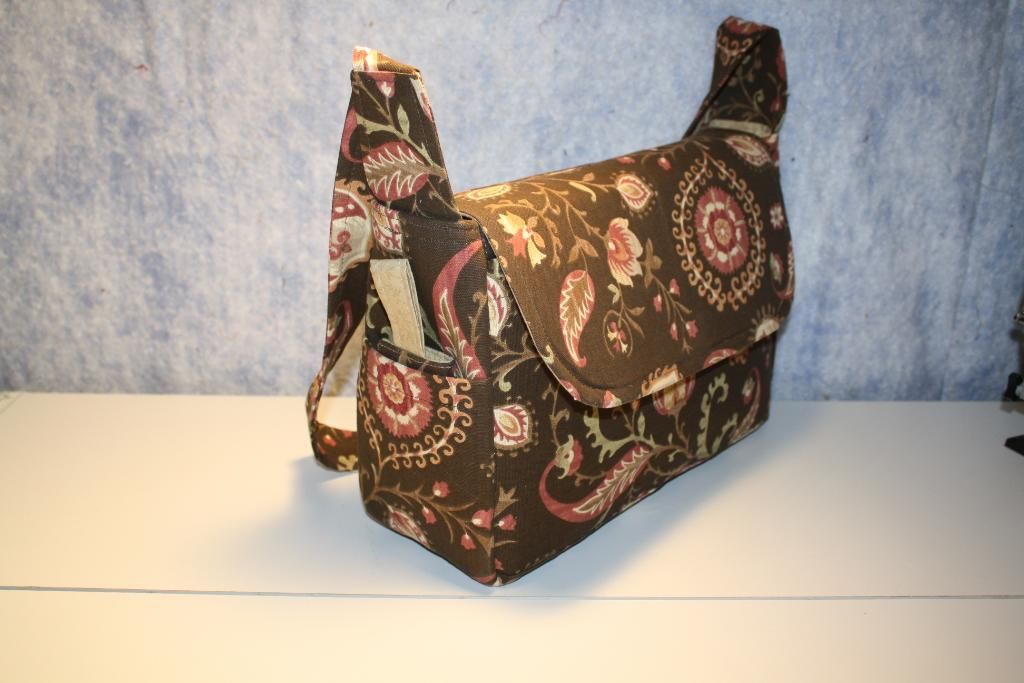
I also knew I wanted a separate compartment for my Kindle Fire, and the top needed to be closed instead of open.  That way if it falls over in the car it doesn't all spill out.  I also knew for sure that I wanted to put small pockets on the short sides, because that's were I put my cell phone.

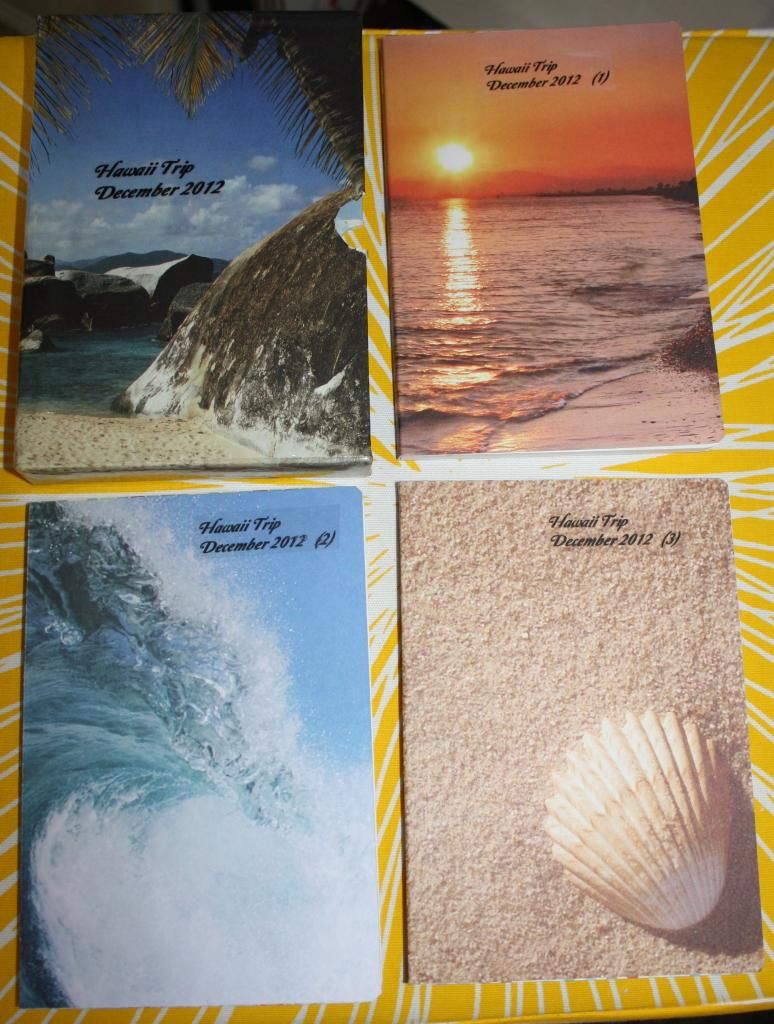
I had made another one a couple weeks ago, but it was too big.  So I thought maybe I'd use it for a carry on bag when  we go to Hawaii in December.  Turns out, I ended up purchasing a set of luggage that has the smallest bag that resembles a purse, so I'll just use that.  Anyway, that bag was too big, so this one I reduced the size by a couple inches each way and it's much better!
Here it is!!!
Photobucket

Photobucket

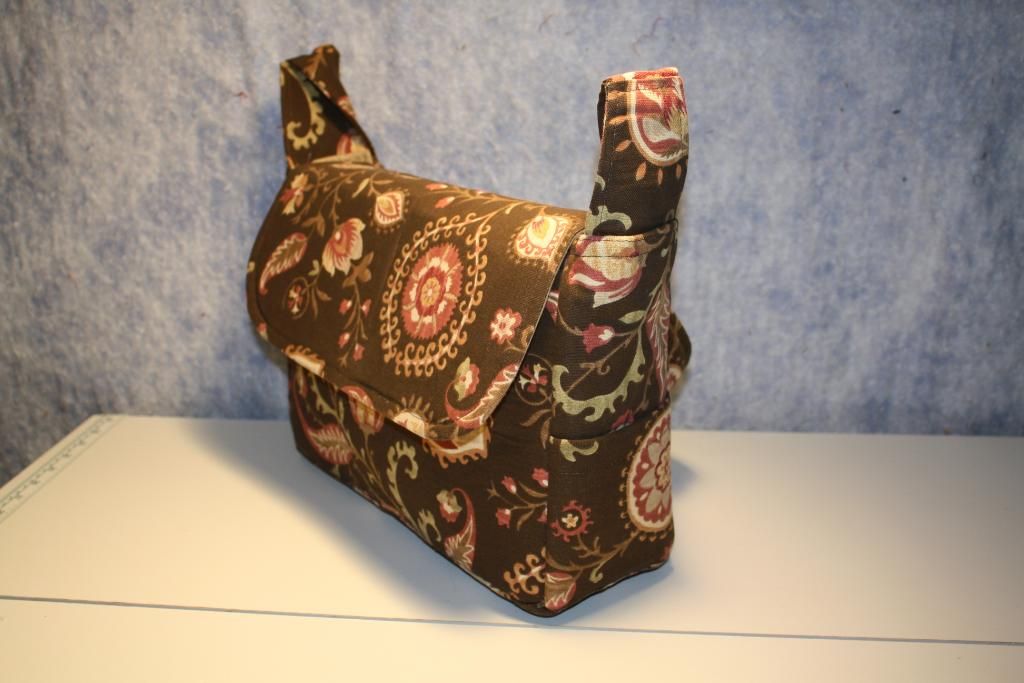
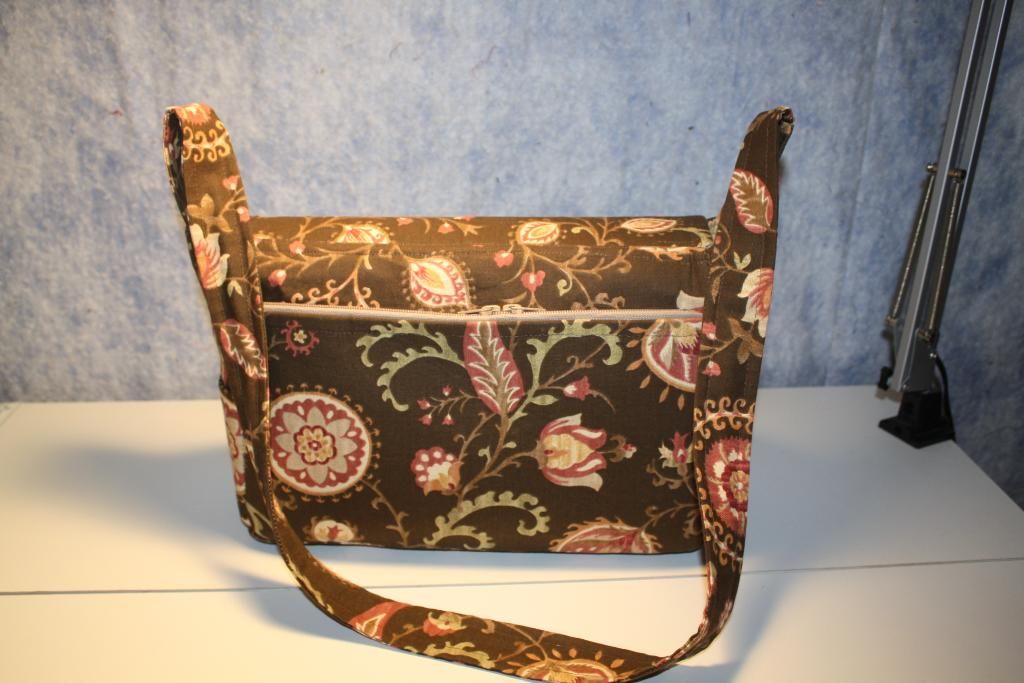
It has a zippered compartment on the back to hold my Kindle Fire.
Photobucket

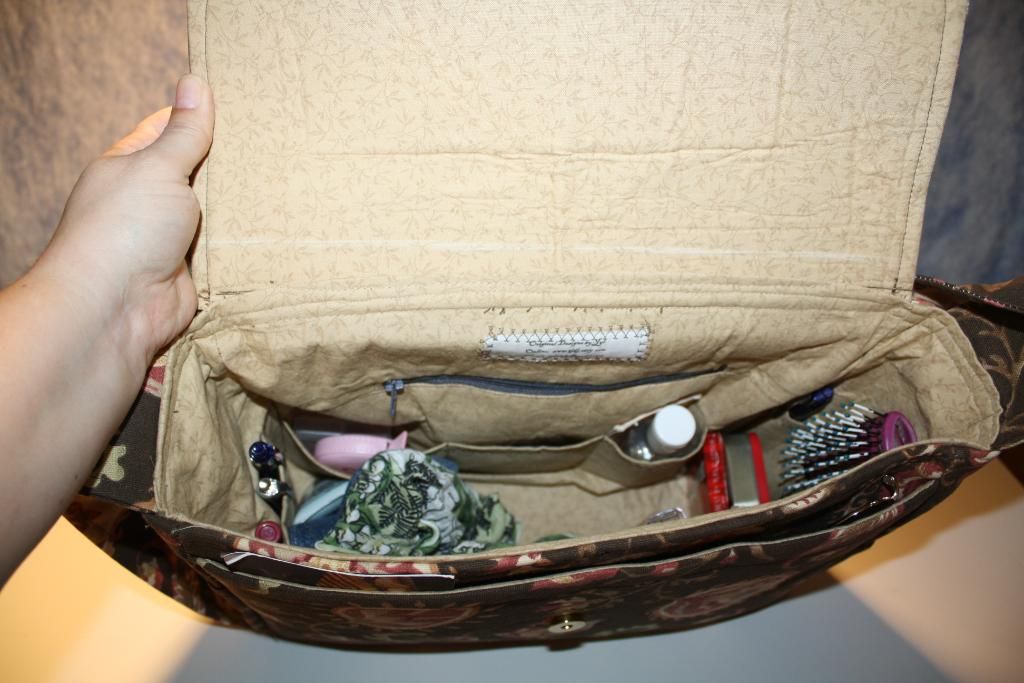
The inside has all the small pockets I always put in, in addition to a zippered compartment!!  That was something new!
Photobucket

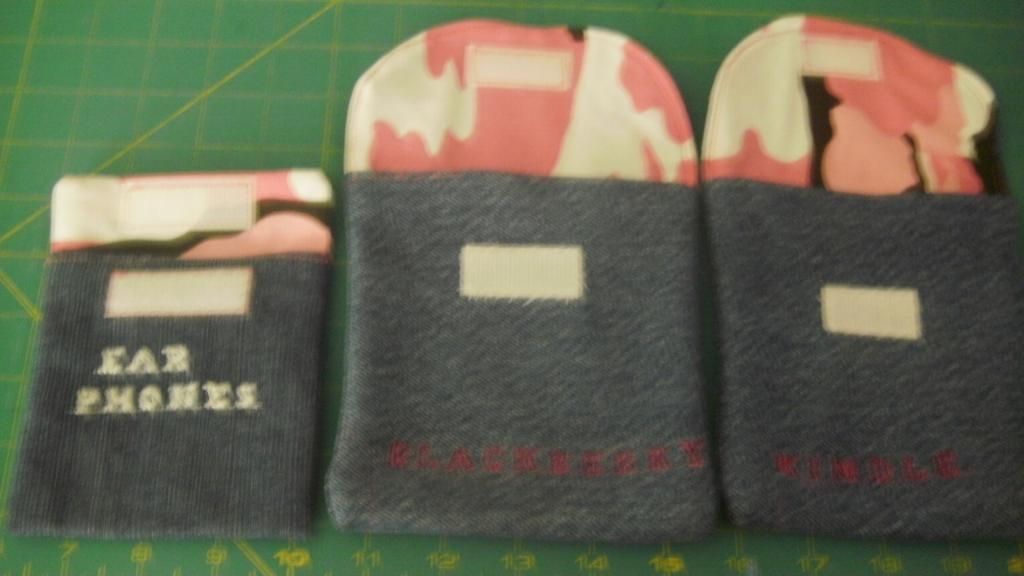
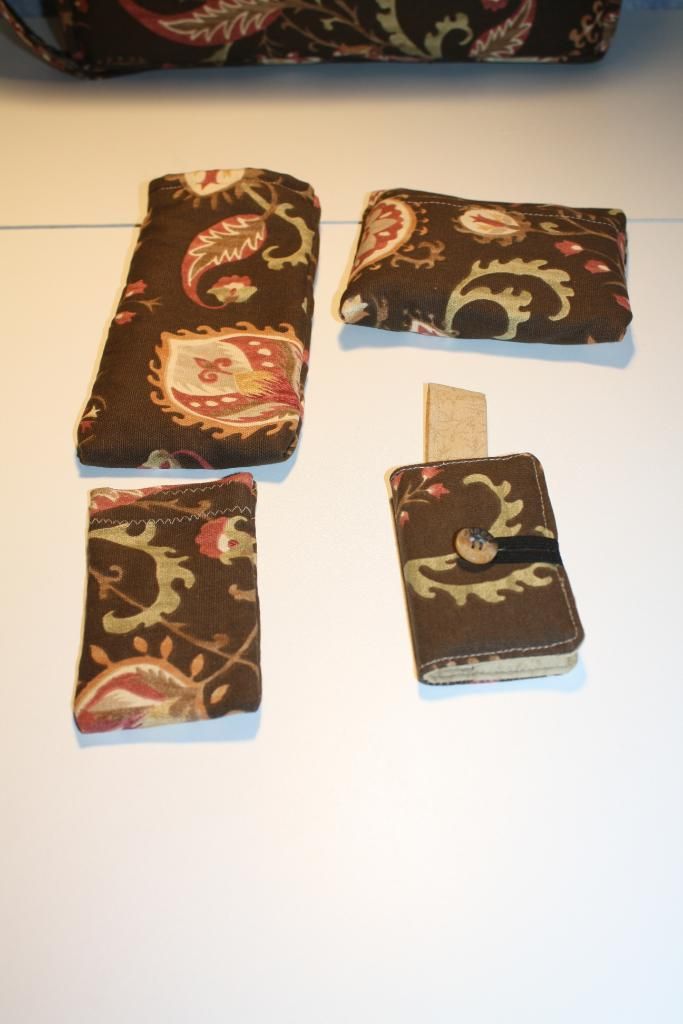
Of course, I also had to make some "accessories" - sun glass holder, tissue holder, small pouch for my dental floss/tooth pick things, and a business card holder.
Photobucket

And a wallet!  Made a few changes to this, too.  I added more slots for cards, etc and it's not quite as wide as the other one.  I also kept a plastic slot on the front for my drivers license.
Photobucket

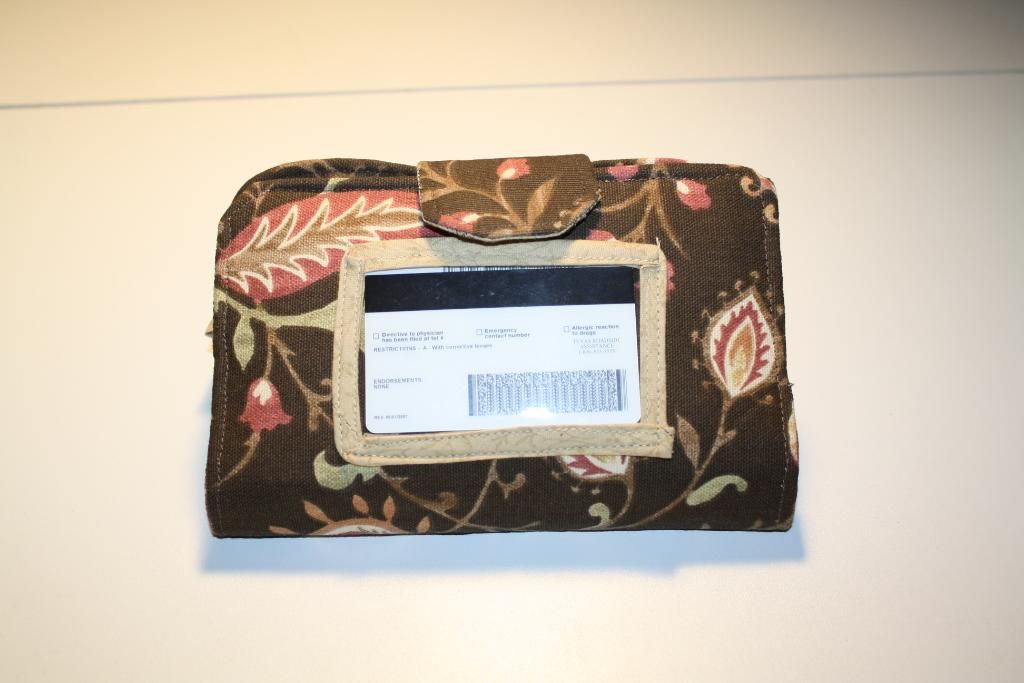
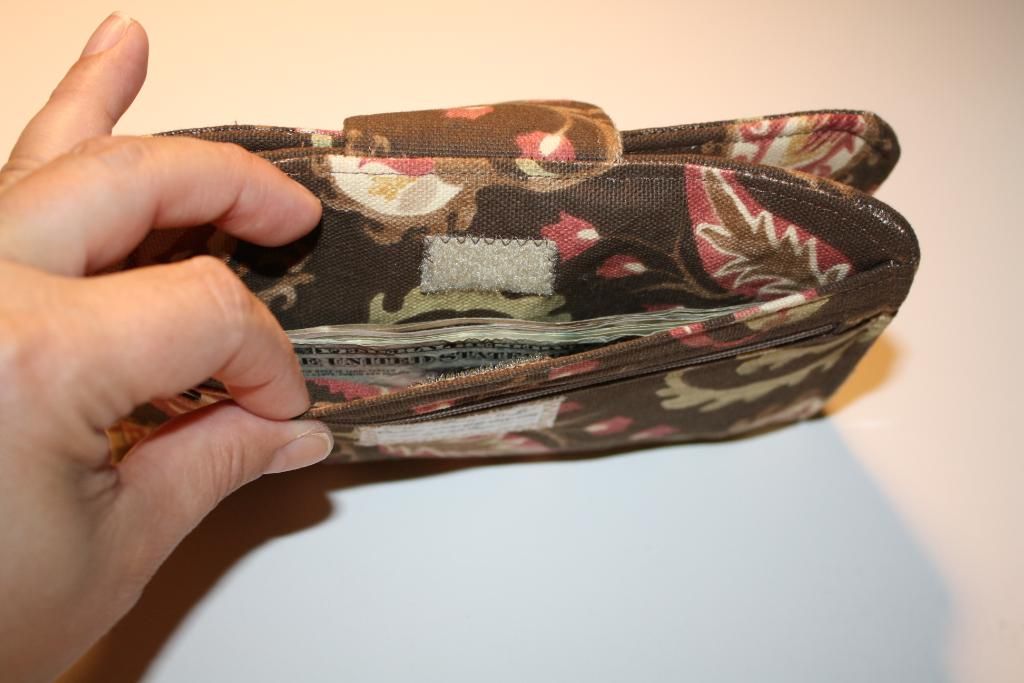
The back has a zippered compartment for change, and behind that is where I keep my money.
Photobucket

Photobucket

The inside (with a place for my pen!):  (Yes, that is an AARP card!  Todd turned 50 this year so we're now members!  lol )
Photobucket
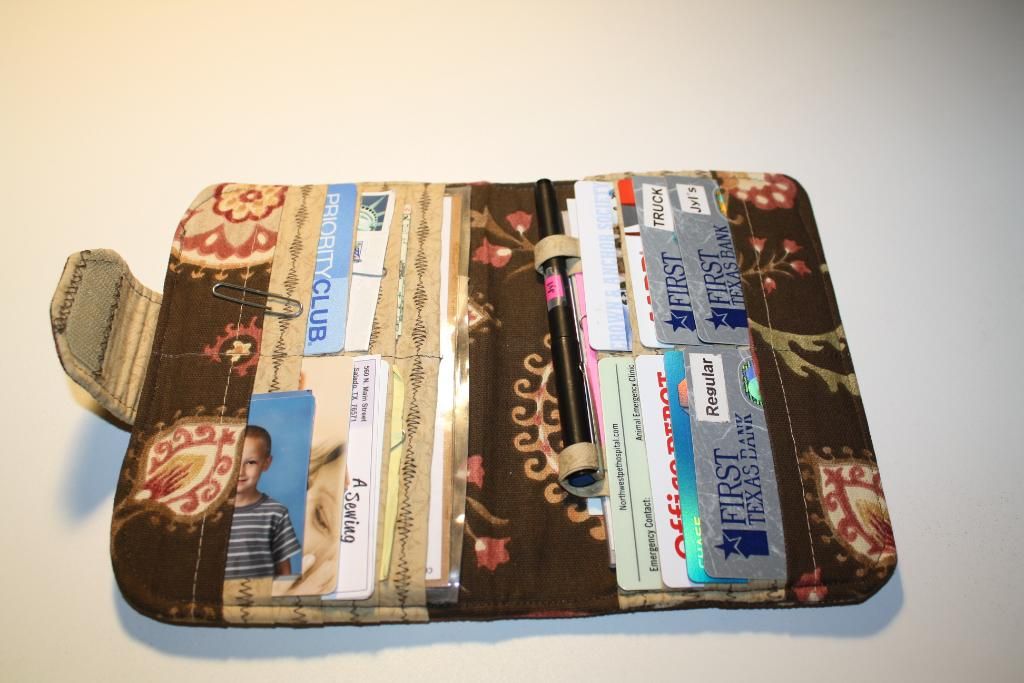
Think we have enough checking accounts?  We have a total of four - they are all joint accounts, but a couple we use specifically for Todd's business, I have one for my sewing business and then the regular one for household bills.

There's also space underneath the cards for more storage (deposit slips, etc).
Photobucket

Photobucket
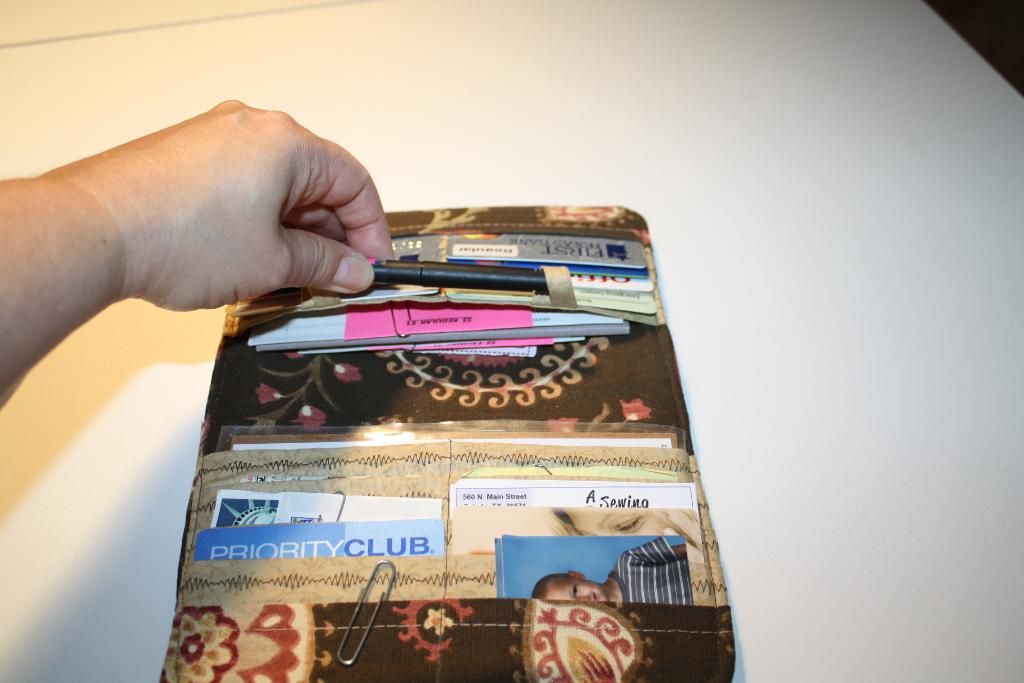
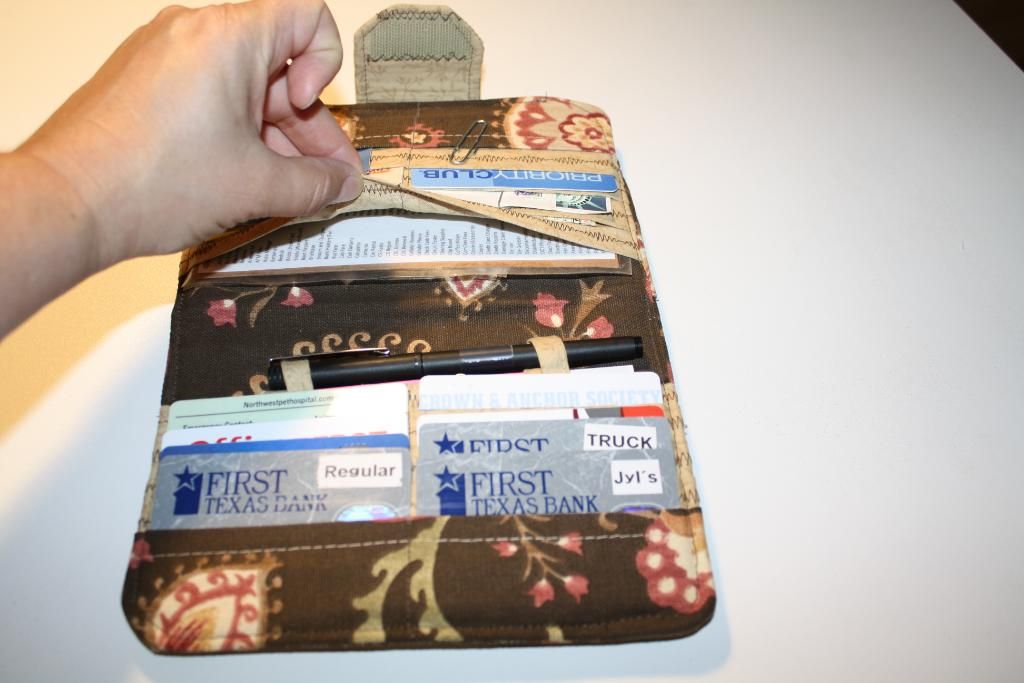
(That long list is what we can purchase for Todd's business that are tax deductions.)

Everything is still pretty stiff, but as I use it more and more, it will loosen up.

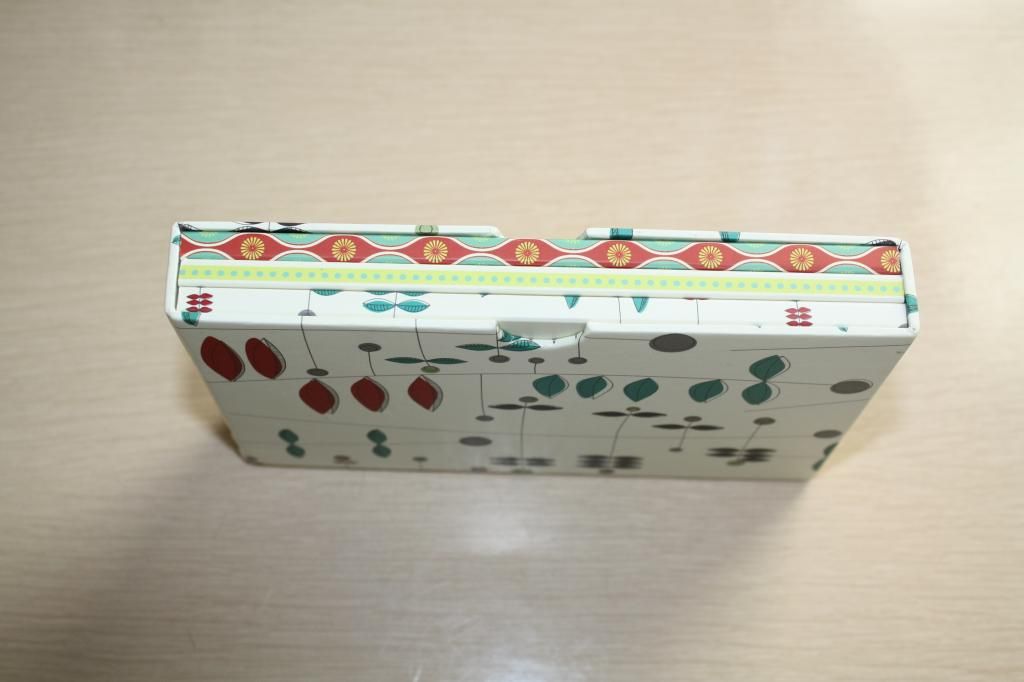
And speaking of my Kindle Fire - I just HAD to make a new cover for it to match!!! lol It's not quite as bulky as the other one, so it fits in my purse a lot better.
Photobucket

Photobucket

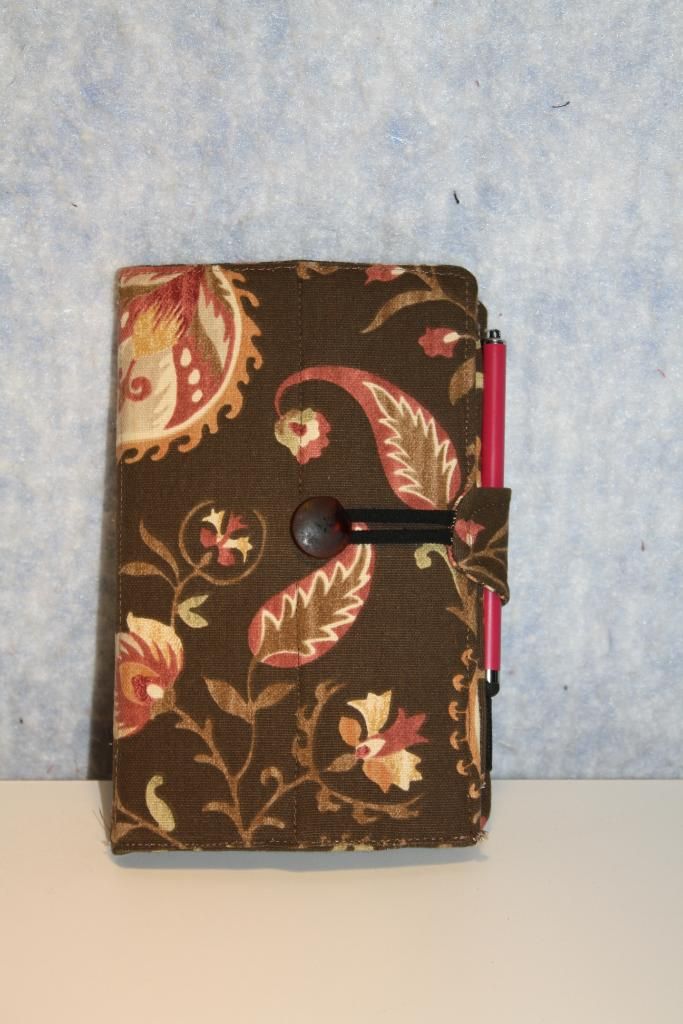
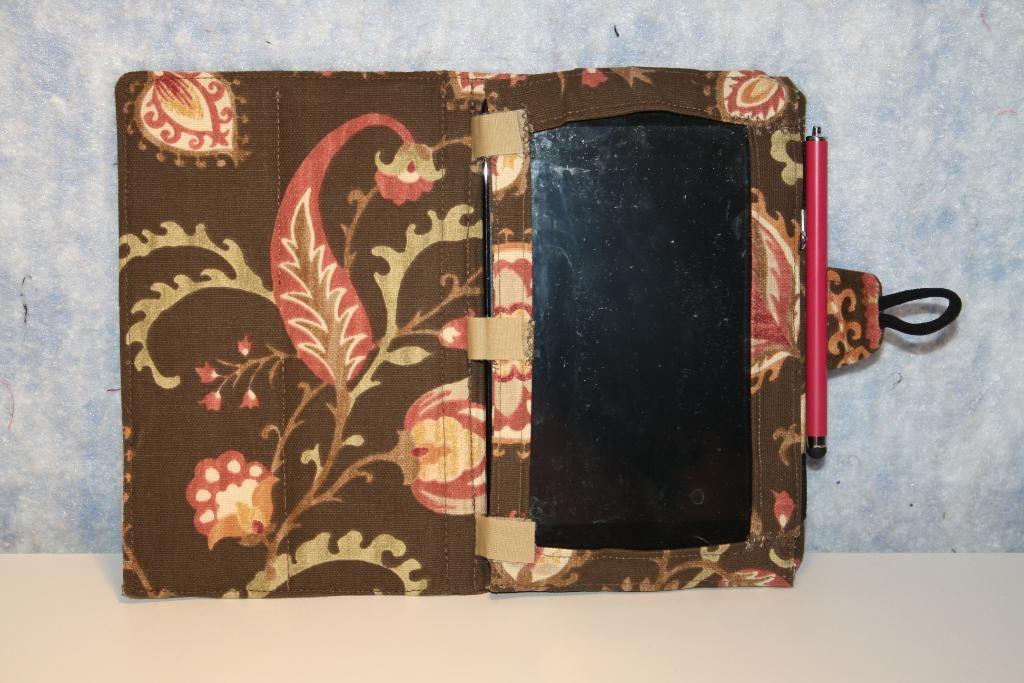
I did still make the front so I can fold it over and it props up itself.  The other one I was using had elastic that covered up the speakers, so I made sure this one doesn't do that.
Photobucket

Overall I'm very pleased with everything.  I really LOVE this fabric!!!!

Have a wonderful week!!!!!

Something new!!!! Ironing Board Covers

I've been needing to recover my ironing boards (yes, I have three) for a LONG time.  Since I'm no longer working (at all - finally!), I decided to tackle that job last week.  You can imagine how much I use the ironing boards since I sew a lot.  The purses and bags I make have fusible interfacing in them, so the biggest ironing board is rarely put up.

Here is the "Before" picture:
Photobucket

A closer look - you can see a couple holes that have started to tear.  I've tried to wash it, but it would never come clean.
Photobucket
It's a cheap WalMart ironing board and the metal beneath has warped, so the top is not even at all!

The middle size I have is one I picked up at one of the local thrift shops for $4.  There's not a whole lot wrong with that one besides not much padding on the top and being kinda dirty.
 Photobucket

The smallest one I really don't use a whole lot, but I figured I was doing the other two, so I might as well do that one, too.  It's small and made for sleeves, etc.  It was another thrift store find and didn't have ANY cover on it.
Photobucket
And it's actually double sided, but I haven't gotten the smallest side done yet, but everything is cut out.
Photobucket

I decided I needed to use some cotton batting on the bottom to make it even out some, then purchased Ironing Board Batting at JoAnns and added another layer to the top.  I kinda cheated and just sewed the new top onto the old one so the bottom isn't very pretty.  But the top is!!!  I used some thick Ikea fabric on all of them.  Here is the "After" of the biggest one:
Photobucket

The middle sized one, I thought it needed two layers of the IBC Batting.
Photobucket

And the smallest one:
Photobucket

So now I have a matching set!!!!!!

Untitled